Project Vagabond - Production Blog
- brandonmcrae
- May 14, 2023
- 9 min read
Updated: May 15, 2023
To see how research was applied to the level design process click:
To see the research
Week 1
We spend this week beginning the planning and preparation for the preproduction phase of the project. For this we first gathered out communication network by setting up a discord server which Leanne happily set up. With this server set up with the different role channels that made it easier to keep track of everyone’s progress and keep files separated.
The next order of business was to get an unreal project created with an accompanying github repository so we could update the project regularly. I assigned Timothy to be responsible for managing and setting it up as me and the narrative designer worked through some ideas for our game, making sure to record some reference images etc in a miro board which you can see below:


Finally, I began working on a GANTT Chart to track our personal deadlines.
{Editor notes: It became so rarely used that I stopped working on it in favour of setting tasks through weekly meetings}

Week 2
After pitching our idea to the tutors, we were given feedback that resulted in us having to rework the initial idea into something different and so we decided on an idea brough forward by our narrative writer Tristan Called Project Vagabond with new additions to the miro board as you can see here:
Before we got our GDD made I used what we’d discussed in class to put together some little things to do in the meantime that we knew we definitely needed and so I made a simple checkpoint system that could be expanded on later on in the project. That way we had a mechanic to return the player to the play area when they die or fall out of bounds.


I also put together a timer using the game instance and a custom component I added to the player. The timer was in place as we discussed to add some replay ability to the levels by giving the player a score to beat.

{Timer was forgotten about so I had to grab a screenshot in the newer files}
Later in the week we held our weekly meeting where we discussed a number of different things including the sound request form. We set our tasks for the following week and I, Leanne and Timothy decided our sound director would be Timothy and so he and Thomas would work with each other along with our input.
In my spare time I sat down with our Rigger and Animator Liam to show him how to import his animations from maya to unreal using the “Game Exporter” and how to set them up in an animation blueprint however due to workloads increasing I offered to do that for him.
Week 3
With our game idea fully worked out we were able to begin putting together the pre-production for the project starting with the Games Design Document. I assigned Tristan to that to give me time to work on the smaller mechanics like traps and world hazards.
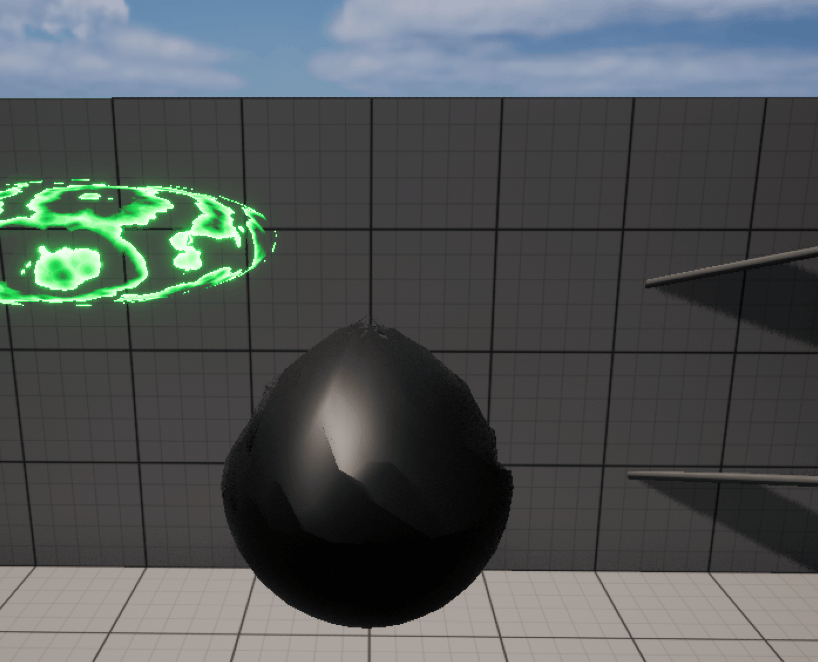
I first made a buzzsaw that when the player touched it, it would throw them backwards in a sequence that was planned for an animation. {which later never got added.}
I also made a teleporter trap that later became a general teleporter that could be used to either end the player back in the level or forward in it.


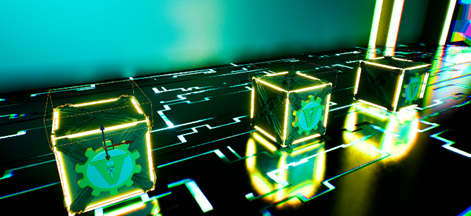
I also decided that it would be a smart idea to add cog boxes that would give the player a set number of cogs if they destroyed it with either their sword or jumping on it. I also made it so that if the player jumped on the box it would propel them up, giving them more momentum.
I began my first attempt at the aiming system with varying levels of success. I was able to get the aim to adjust with the mouse input however it only worked with one axis and it was not directly tracking the course position and so the aim was able to loop.
Week 4
As I was going through the project and sorting any stray saves not in the correct folders, I noticed that our controls were inside the player and not in a controller. This wasn’t necessarily an issue but I believed it was better practise having our own controller. It also cleaned the player blueprint a bit not having all the input code buried in with all the other stuff. The only thing I couldn’t move was the jumping code as doing so broke the rotation even with the references recreated.
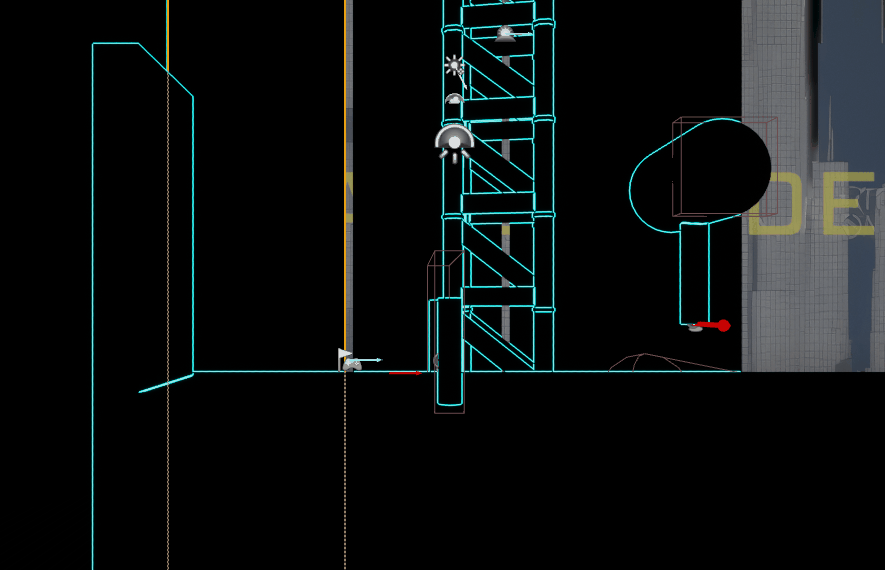
I Implemented a fix to the aim code so that it would track the position of the mouse cursor with help from Ryan Blair from group b. We set up the character controller with a complex sequence of trace related nodes and some rotation sets to translate the position of the mouse into a translatable world rotation for the aiming spring arm. I would not have been able to fix this without him as I didn’t know were to start. The new system looks like this:

Week 5
From this point the level design pipeline was slow so me and Timothy had to begin working in the level design team as there was only one beforehand. With this change of focus I began putting together some pre-production for the level I was starting, include a moodboard, some rough sketches and some research and notes that would guide my design process.
In order to begin designing the level I first needed to create a design philosophy that I could stick to while I developed the level and iterated on the design choices I was making. The first Philosophy that came to mind was nintendo's "Kishotenketsu" style. through some digging I found an article that references an interview gamasutra had with super mario 3d land director koichi hayashida.
In short, the information I gathered was that the technique has a key theme of "Introduction, development, twist and wrap-up".
The technique "originated in chinese poetry, but was adopted by japanese and korean writing" - Phillips, 2015. It tough the topic of how "In four sections you can introduce a topic, develop it, give it an unexpected twist, then bring it to a conclusion" - Phillips, 2015
These quotations were the bread and butter of my philosophy moving forward as I began to produce pre-production
Week 6
This week I began implementing the design of my environment backdrop and creating some play zones to mess with the verticality.


I added two early screenshot before I finished the play area to give a reference to my starting point for this week. Through my research (more details in level design portfolio) I expanded the level and added the 4 sections with plans to build on each one in the coming weeks.
Week 7
This week I started by creating a Render Shader using a tutorial I had from research in my programming that would play when the player is spawned in at the start of the level however no one really talked about it and it was relegated to reference material. VFX was a new area for me so I thought I'd share my first real bash at it.


While I was making shaders, I decided to make a materializing shader using another tutorial and implemented the right code to the teleporter to make the player phase out and back in again during the teleport.
Week 8
I began working on the Dialogue system that was planned to be used with the host icons in the HUD to give us a way to convey interaction with the hosts without having to record voice lines. I also added an opening cutscene as the team decided through feedback that it wasn't obvious the player didn't have control while the host's talk at the start.
Week 9
At this point we decided to fully commit to the cyberspace idea and so after we held a meeting about it, it was concluded that we would change the narrative in a way that would accommodate the assets currently in the pipeline have project vagabond take place on the internet through a cyberspace that could generate any environment.
I expanded the level a little by adding some narrative elements by making a cutscene just before the end and adding a button block to teach shooting.
Week 10
This was our industry test week and so we had a number of people playtest our game as it was to gather feedback through a form, I had tasked our QA Lead to create the week before. That along side some verbal feedback gave us what we needed to improve the game.
The issues I had to fix with my level were as follows:
· It was difficult to see the player character behind all the visual noise created by the wireframe material I was using.
· I was hard to see in certain sections of the level
· The dialogue prompt currently being used was useless sense it didn’t show which host was talking
· There was no game feel
I also implemented the aim and slash animations and split the blend so that the legs could idle or run when the player is slashing. I also tried to add the aim to work the same way in conjunction with the idle/run however that did not work as intended.
Week 11
I started this week by changing the wireframe material in the background to a Tron-like glow material to create more contrast between the player and the background. I also changed the floor to a circuit material. With some input from the tutor, a Panner/rotator effect was added to a glow that passed through the whole texture that made the floors look like they had power running through them, giving the environment some life.
With more input from the tutor I added some game feel using post-processing effects. With some key effects like dirt masks, chromatic aberration and some light tricks I was able to get the game to look less flat however I forgot to make it an effect on the player so I was only visible in my level.


I created two really simple prompt boxes and duplicated both the macros and widgets, assigning the correct prompt box to each one. This finally made the host’s dialogue lines distinguishable from each other.
Week 12
The original aiming idea had to be scraped as I was unable to find a way to pass the aim animation through whilst utilizing the aim offset without the legs getting stuck together. To not put all the work to waste I decided to make the shooting a static action using a montage as with that we could at least blend the idle/run animation with the aiming one to create a seamless transition. I also tried adding the double jump and wall jump however the set up was bugged and the animation was able to get locked and I ran out of time to fix it.

We were finally given all of our assets in multiple google drive links after a bit of chasing up from the production team. My hopes for getting all the assets in as my workload was maxed out with patching and package prep so I promised them I would get as many in as I could.
I managed to get William’s checkpoint mesh imported and implemented into the game.

Week 13
Imported and implemented the two hosts and attempted to set up the host 1 facial animations however they would not package. Additionally, when I imported the host 2 mesh I received one animation clip. Unfortunately, due to time constraints that meant I couldn’t get the second host animated.
Whilst finalizing the last of our final level I decided to stop putting of going back through and implementing assets as it was a big mistake. The first thing I noticed was that we didn’t have a mesh for our “Cog Crates” and so I had to go asset hunting. Before hunting I did a touch up on my knowledge of the different licenses we had at our disposal. Because we have no financial backing, we had a choice of either public domain or Attribution 4. While public domain would be easier it is also more time consuming as most game ready assets have some kind of attributing or paid license which makes CC By 4.0 a better pick sense the supply will be higher.
I first looked at the guidelines given by sketchfab in their license breakdown page and gathered some key points to run off just in case. The main take away was that we were free to adapt and change the model so long as their name was credited somewhere, be it the project itself or the public pages like itch.io etc.

With all the legal stuff covered I then found a box model that was under CC by 4.0 and imported it into the project. Once there I began adding some extra features to change the model’s appearance slightly to make it match our art style better.

Through adding our cog mesh to the box and making the frame glow I was able to give it a visual distinguisher to the player.
Throughout the week I was helping in other areas and didn’t get a chance to finish all the patches to my level however we had a number of models to import from last weeks dump and unfortunately due to both burn out and added struggles with getting the first host’s facial animations working I was unable to get them all in, but I got what I could into it.
Final note (Irrelevant to submission)
Due to how much extra help and silly things I was doing in-between working on the above mentioned stuff I was unable to fit everything in the word count, so I've condensed my research in the portfolios


Comments